Control Me
Introduction
Control Me is a new feature in the Lovense Cam Extension. It allows cam models to control tippers' toys. Models need to set up this feature in the Cam Extension while tippers connect their toys via the Vibemate app.
Model Setup
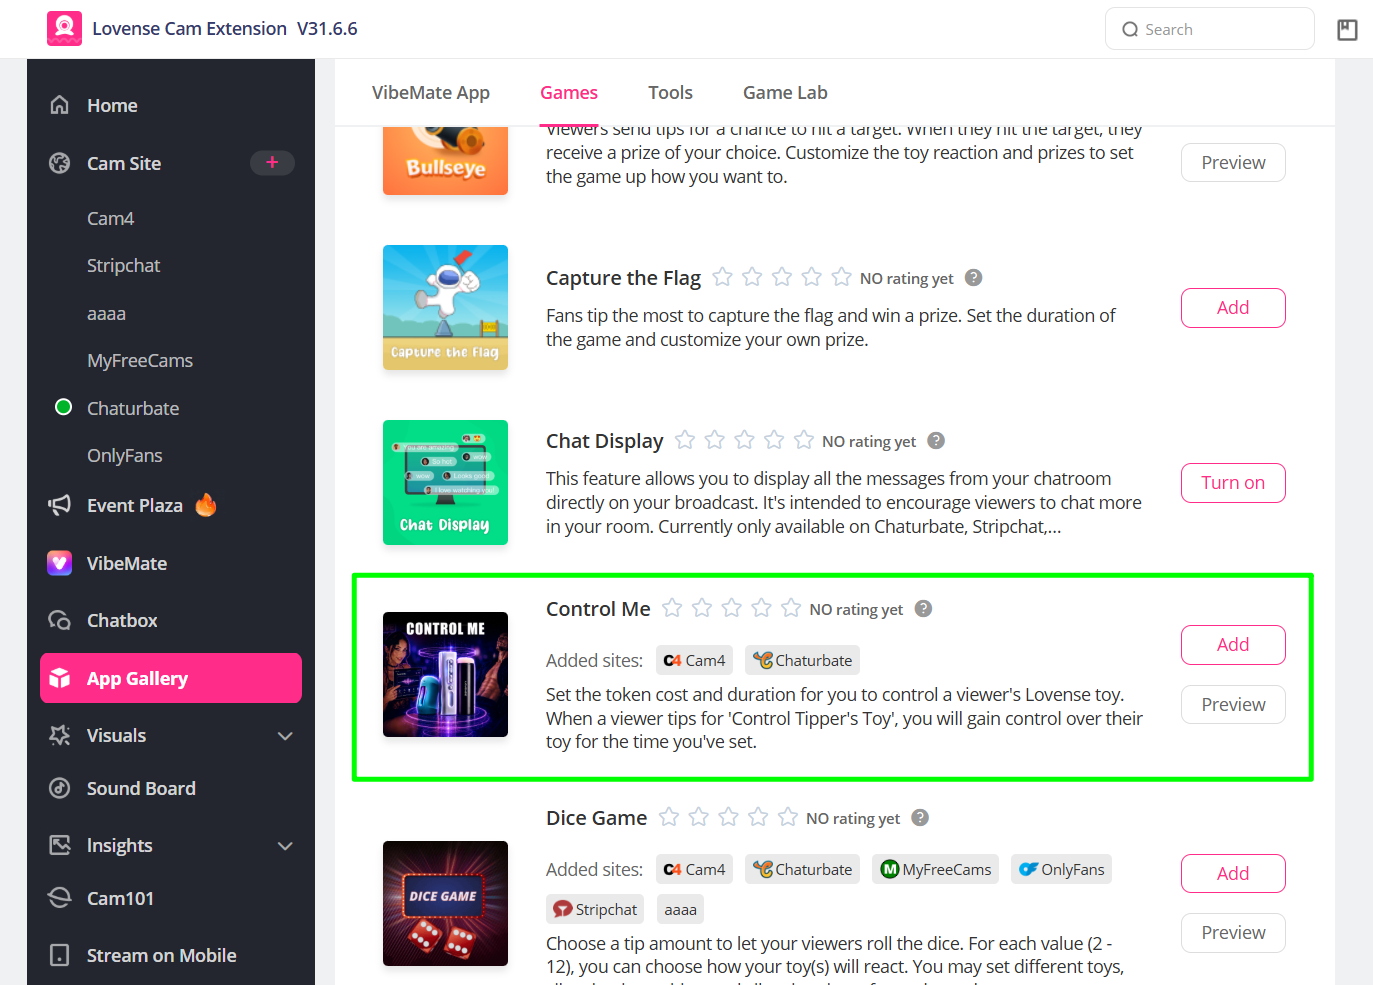
Step 1: Add Control Me from the App Gallery
Add Control Me from the App Gallery in the Lovense Cam Extension.
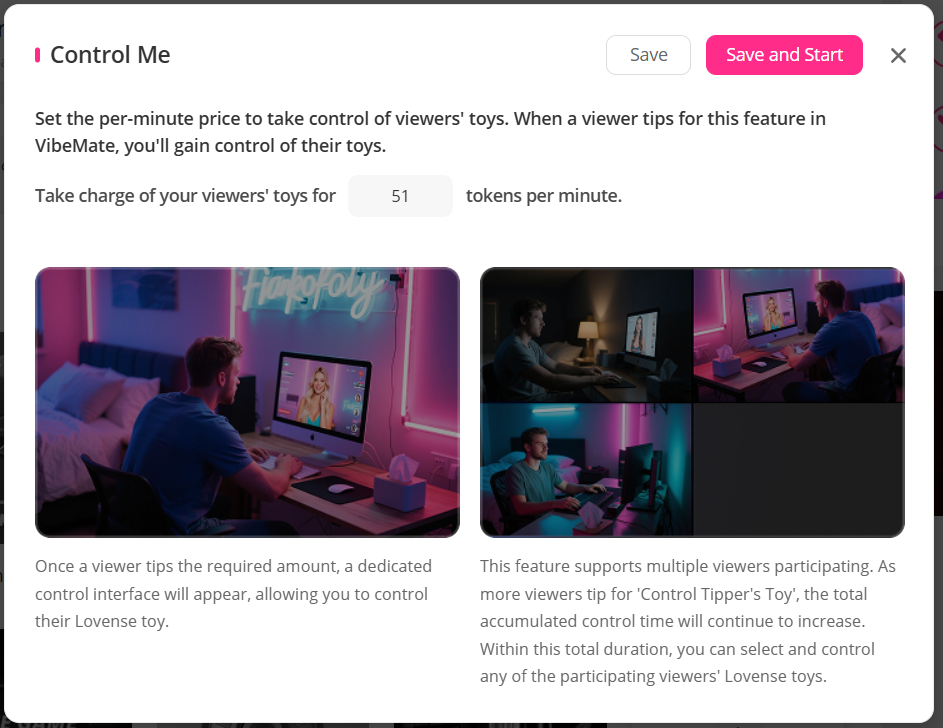
Step 2: Configure Settings
Models can set pricing per minute for controlling viewers' toys.
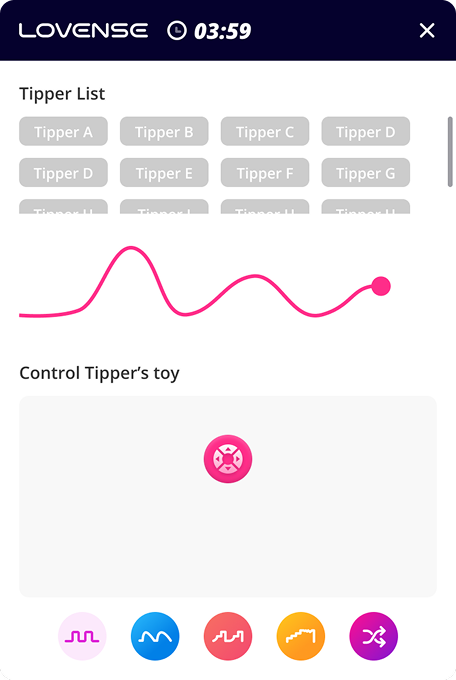
Step 3: Control Tippers' Toys
On the viewer's side, the app rules and status will be displayed. Viewer members can scan the QR code and connect their own toys via the Vibemate App in advance. You can also customize the entry point for the Control Me feature on the viewer side.
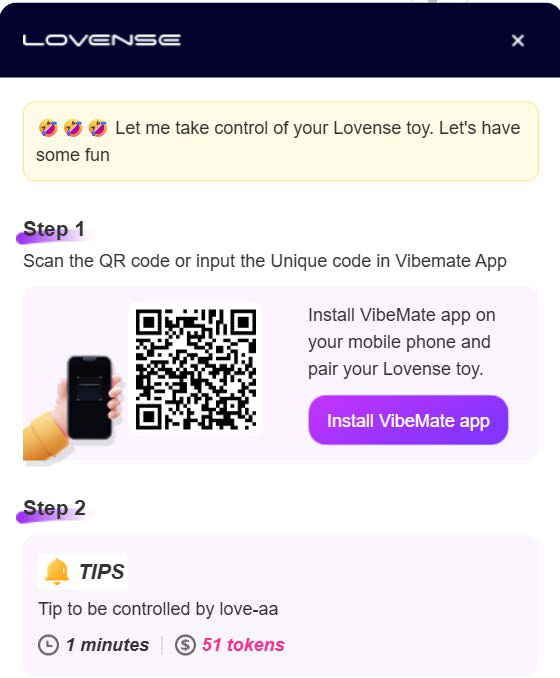
When viewers successfully scan the QR code and connect their toys in the Vibemate app, they can then tip to let the model control their toys.
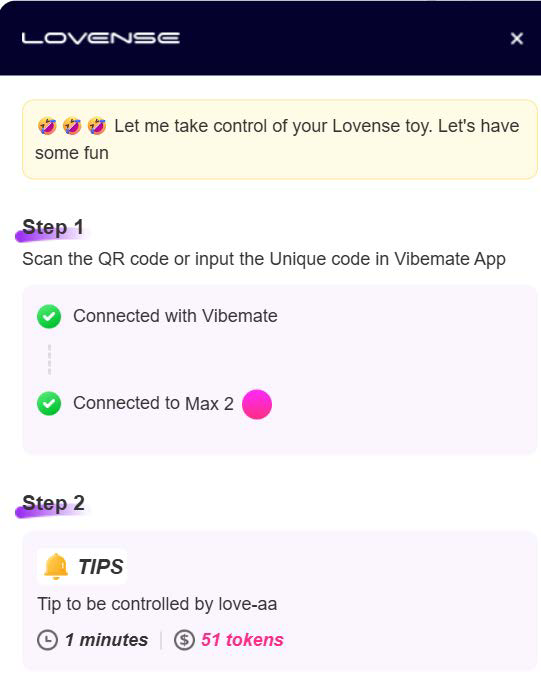
After the viewer/tipper establishes connection, the cam model can start controlling their toy(s) through the control panel until the countdown ends. Models can control toys through the control panel, either manually with their mouse/keyboard or with one of the preset patterns.
Platform Integration Guide
To enable this feature for models on your platform, some adjustments are required according to the following guidelines.
Viewer Side
Step 1: Import the Cam JDK script to the viewer's page
<script src="https://api.lovense-api.com/cam-extension/static/cam-jdk/js/core.min.js"></script>
This script will introduce a global variable LovenseCamJdk that contains two classes Model and Customer.
Step 2: Initialize the instance object
Initialize an instance object using the class Customer.
const { Customer } = window.LovenseCamJdk
const customer = new Customer(initOptions)
Parameters:
| Name | Type | Description | Required |
|---|---|---|---|
initOptions | Object | Configuration object containing keys described below. | yes |
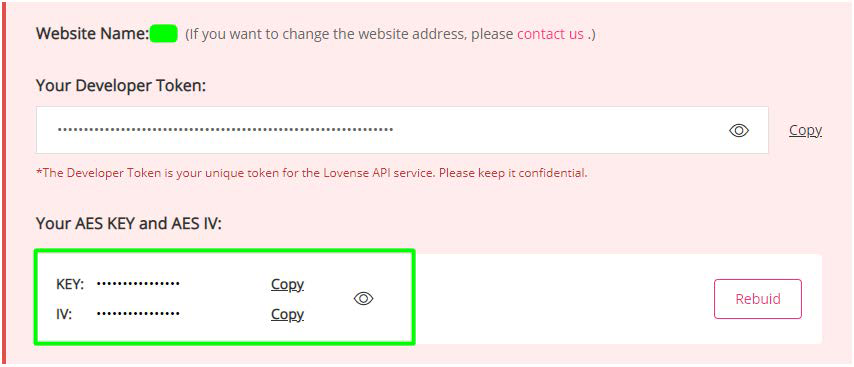
initOptions.platform | String | This is the Website Name shown in the developer dashboard. | yes |
initOptions.modelName | String | The model name encrypted using the AES KEY and AES IV. | yes |
initOptions.customerName | String | The viewer name encrypted using the AES KEY and AES IV. | yes |
initOptions.gameName | String | This is the name of the specific game. In this case, the value take-control is fixed. | yes |
initOptions.useLovenseView | Boolean | Whether to use the interface provided by Lovense or design your own. | no |
initOptions.gameWrap | HTMLElement | The DOM container that the game interface is embedded into. | no |
Description:
Lovense has included all the interactive interfaces needed for Control Me. The default is a floating widget on the page. You may also choose to embed it into the page: set aside an empty DOM container and pass it as the initOptions.gameWrap parameter.
Of course, you may also design and implement the interfaces yourself, just set the initOptions.useLovenseView parameter to false. Lovense will provide you with all the data interfaces you need, as shown below.
About the encryption mentioned above, you can get the AES KEY and AES IV from our developer dashboard.
Here is a demo on how to encrypt text using AES in JAVA:
import org.apache.commons.codec.binary.Base64;

import javax.crypto.Cipher;
import javax.crypto.spec.IvParameterSpec;
import javax.crypto.spec.SecretKeySpec;
import java.security.AlgorithmParameters;
import java.security.Key;

public class AESDemo {

    private static Key getKey(String key) throws Exception{
        byte[] keyBytes = key.getBytes("UTF-8");
        SecretKeySpec newKey = new SecretKeySpec(keyBytes, "AES");
        return newKey;
    }

    private static AlgorithmParameters getIV(String iv) throws Exception {
        byte[] ivs = iv.getBytes("UTF-8");
        AlgorithmParameters params = AlgorithmParameters.getInstance("AES");
        params.init(new IvParameterSpec(ivs));
        return params;
    }

    public static String encrypt(String key,String iv,String text) throws Exception {
        Cipher cipher = Cipher.getInstance("AES/CBC/PKCS5Padding");
        cipher.init(Cipher.ENCRYPT_MODE, getKey(key), getIV(iv));
        byte[] encryptedBytes = cipher.doFinal(text.getBytes());
        return new String(Base64.encodeBase64(encryptedBytes, false,true),"UTF-8");
    }

    public static String decrypt(String key,String iv,String text) throws Exception {
        byte[] textBytes = Base64.decodeBase64(text);
        Cipher cipher = Cipher.getInstance("AES/CBC/PKCS5Padding");
        cipher.init(Cipher.DECRYPT_MODE, getKey(key), getIV(iv));
        byte[] decodedBytes = cipher.doFinal(textBytes);
        return new String(decodedBytes, "UTF-8");
    }

    public static void main(String[] args) throws Exception{
        String key="jHZZwiizsAF2qTAY"; //use your own Key here
        String iv="zijknVpNWeeTYGPV"; //use your own IV here
        String test="Hello World!";
        System.out.println(encrypt(key,iv,test));;
        System.out.println(decrypt(key,iv,encrypt(key,iv,test)));;
    }
}
Step 3: Change Model (optional)
If your website is a single page application, when the viewer switches to watching a different model, call the changeModel method to refresh the state.
/**
 * @param {String} modelName The model's name encrypted using the AES KEY and AES IV
 */
customer.changeModel(modelName)
After switching the model, call reactivateGame to re-activate the game for the newly selected model.
customer.reactivateGame()
Example
const { Customer } = window.LovenseCamJdk
const data = {
  platform: "cam site name",
  modelName: "encrypted model name",
  customerName: "encrypted view name"
}
let customer = null

const initTakeControl = () => {
  customer = new Customer({
    platform: data.platform,
    modelName: data.modelName,
    customerName: data.customerName,
    gameName: "take-control"
  })
}
initTakeControl()
Viewer Side Data API
If you choose to implement your own interface or show some additional interfaces on the model's streaming page, use the following data API.
Method
getGameSetting
Get the model's game settings configuration and game status.
/**
 * @returns {Promise} gameSettingResponse
 * gameSettingResponse: {
 *   gameSetting: Object|Array|null, // game settings configuration
 *   isAppStart: Boolean // game enable status
 * }
 */
customer.getGameSetting()

// example
const gameSettingResponse = await customer.getGameSetting()
getGameStatus
Get information about the current viewer's game status.
/**
 * @returns {Promise} gameStatusResponse
 * gameStatusResponse: {
 *   qrCode: String, // QR code information
 *   status: Number, // game status:
 *                   // 1 not connected via the Vibemate app QR code
 *                   // 2 Vibemate app connected but no toy connected
 *                   // 3 toy connected, ready
 *                   // 4 currently being controlled
 *   modelName: String, // current model's name
 *   followModelName: String // name of the model who is controlling this viewer
 * }
 */
customer.getGameStatus()

// example
const gameStatusResponse = await customer.getGameStatus()
getGameRunningInfo
Get real-time info about Control Me while it is currently running.
/**
 * @returns {Promise} runningInfoResponse
 * runningInfoResponse: {
 *   pf: String, // cam site name
 *   excessTime: Number, // remaining time
 *   totalTime: Number, // total duration
 *   joinNum: Number, // number of viewers who tip and scan the code to join Control Me
 *   toyNum: Number, // number of toys controlled
 *   modelName: String, // model's name
 * }
 */
customer.getGameRunningInfo()

// example
const runningInfoResponse = await customer.getGameRunningInfo()
Event
ready
This event is triggered when game initialization is complete. The above methods on the viewer side are only valid if the ready event is triggered.
/**
 * @returns {Object} customer instance
 */
customer.on("ready", (instance) => {})
update-game-setting
This event is triggered when the model turns Control Me on or off.
/**
 * @returns {Object} payload
 * payload: {
 *   gameSetting: Object|Array|null, // game settings configuration
 *   isAppStart: Boolean // the game enabling status
 * }
 */
customer.on("update-game-setting", (payload) => {})
update-game-status
This event is triggered when the current viewer's game status changes.
/**
 * @returns {Object} payload
 * payload: {
 *   qrCode: String, // QR code information
 *   status: Number,
 *   modelName: String, // current model's name
 *   followModelName: String // name of the model who is controlling this viewer
 * }
 */
customer.on("update-game-status", (payload) => {})
update-game-running-info
This event is triggered when game runtime information is updated.
/**
 * @returns {Object} payload
 * payload: {
 *   pf: String, // cam site name
 *   excessTime: Number, // remaining time
 *   totalTime: Number, // total duration
 *   joinNum: Number, // number of viewers who tip and scan the code to join Control Me
 *   toyNum: Number, // number of toys controlled
 *   modelName: String, // model's name
 * }
 */
customer.on("update-game-running-info", (payload) => {})
update-toy-command
This event is triggered when there is a new toy command sent.
/**
 * @returns {Object} payload
 * payload: {
 *   vibration: Number, // vibration level, value interval: 0~20
 *   rotation: Number, // rotation level, value interval: 0~20
 *   air: Number, // air level, value interval: 0~20
 * }
 */
customer.on("update-toy-command", (payload) => {})
game-exit
Triggered at the end of the game.
/**
 * @returns {Object} payload
 * payload: {
 *   type: Number, // ending Type, 1: model ends their broadcast 2: model disables Control Me 3: Control Me session ends
 * }
 */
customer.on("game-exit", (payload) => {})